You're reading an older article from ELECTRICAL CONTRACTOR. Some content, such as code-related information, may be outdated. Visit our homepage to view the most up-to-date articles.
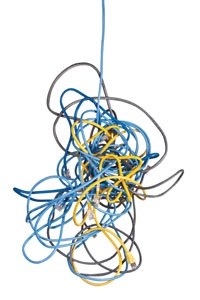
Over the years, I have been in too many communication rooms where cable management was an afterthought or, worse, nonexistent. Ropes of hastily zip-tied cable bundles wind around each other. Open floor tiles reveal a mess resembling the snake scene from “Raiders of the Lost Ark.” Random cable ends stick out all over the place, many with labels such as “do not use,” “old,” and the ever-popular “remove.”
Instead of viewing wire management as one more thing to check off the list, savvy low-voltage contractors make cable organization a priority on every project. Customers see better return on investment when their systems are tidy and well-planned—fewer cables need to be toned and traced, capacity planning is more accurate and the integrity of disparate systems is maintained—and are more likely to call a contractor back for new work when they know moves, adds and changes won’t result in a jumbled mess.
Cable wrangling
Choose carefully among the many cable management options. The right methods for each location should help, not hinder, your efforts at organization. Cable trays and runways often are a good solution for overhead wire management, requiring little manipulation (read: no zip ties) when new cables are needed down the road. Innerduct may be used to direct fiber within this larger pathway, giving the strands protection while maintaining a neat appearance. Bridle rings or other hangers also are reliable options, sometimes offering greater pathway flexibility in cable-congested areas.
Vertical cable runs can be managed with rack-, wall-, and even post-mounted hardware. D-rings and cinch straps are popular, as are raceways and standoffs. Ducting protects floor penetrations and can be used where cables pass through a wiring closet but aren’t terminated or where access isn’t required. Where possible, maintain enough room within the system to easily reach the cables in the event one needs to be removed or relocated. It also is important to ensure the cables are contained enough to avoid the danger of being caught with the toe of a shoe or the edge of a door.
Just because cables are hidden beneath raised flooring is no excuse for throwing organization out the window. Cable pathways still need to be uncluttered and well-marked, leaving as much empty floor space as possible for maneuvering and expansion. Tray systems are available to keep underfloor areas organized, and some offer multiple levels or can be stacked for better density. Remember to remove cut ends and other trash at the end of the job. Leftovers always find their way under the floor.
Color, labels and identifiers
Using different colors for various cable and jack functions—voice, data, fire, security, nurse call, etc.—speeds up the indentification of cables associated with each of the customer’s systems. It simplifies troubleshooting for your team and allows end-users to easily see which jack they should use. In many facilities, voice and data still are divergent systems, and accidentally plugging one into the other could potentially cause problems. Use color-coding to avoid these glitches whenever possible.
Clear, durable labels are how customers and contractors coming in behind you—local telcos and Internet service providers among them—find what they need. The days of sloppy, handwritten tags are over. Instead, invest in a small, portable label maker, and require your field personnel to use it. Thermal transfer labels are nice, but basic units capable of printing on both nylon and heat-shrink tape can be had for less than $100 if your budget is tight. Cable tags also can be used and are handy where adhesives (or their residue) are not well tolerated.
Don’t assume you can infer a site’s numbering scheme by reading the existing labels. It’s preferable to ask the customer how they want jacks and equipment identified, so you are sure to get it right. Some facilities use a combination of building/floor/room numbers, some label sequentially based on equipment or patch panel numbers, and others have developed unique conventions. If you are installing in a new data center or wiring closet, the customer may want you to start an entirely new numbering sequence.
In my experience, schemes based on building, floor or room numbers look great when first installed but can become a mess over time. For example, room 155 has two jacks (155A and 155B), which are next to each other on the patch panel. A year later, 155C is installed on the next open port, which is one patch panel over. The numbering on the panels is now out of order, and the customer must hunt for each label.
Alternatively, sequentially numbering jacks at the patch panel often works well. They are easy to find in the data center, and if you maintain even a rudimentary floor plan or spreadsheet, locating the other end of the cable is usually pretty easy. Different customers will have different preferences, though, so be sure to ask.
KNUDSON worked in facilities and telecom management before becoming a freelance business writer. She can be reached at www.julieknudson.com.
About The Author
Julie Knudson worked in facilities and telecom management before becoming a freelance business writer. She can be reached at www.julieknudson.com.